Imagine transforming your backyard into a comfortable oasis where you can escape the sun’s rays without retreating indoors. Whether you’re a seasoned DIY enthusiast or just starting out, creating your own shade structures can enhance your outdoor space, making it more inviting and functional. In this article, we’ll explore 11 creative and accessible DIY shade solutions that cater to various skill levels and can be tailored to fit any backyard aesthetic.
From practical pergolas to charming sail shades, each project is designed to inspire and guide you through the process of elevating your outdoor living area. You’ll discover a range of ideas that not only provide relief from the sun but also add a personal touch to your backyard sanctuary. Let’s embark on this journey to craft a shaded retreat that reflects your style and enhances your enjoyment of the great outdoors.
Crafting a Classic Pergola Design
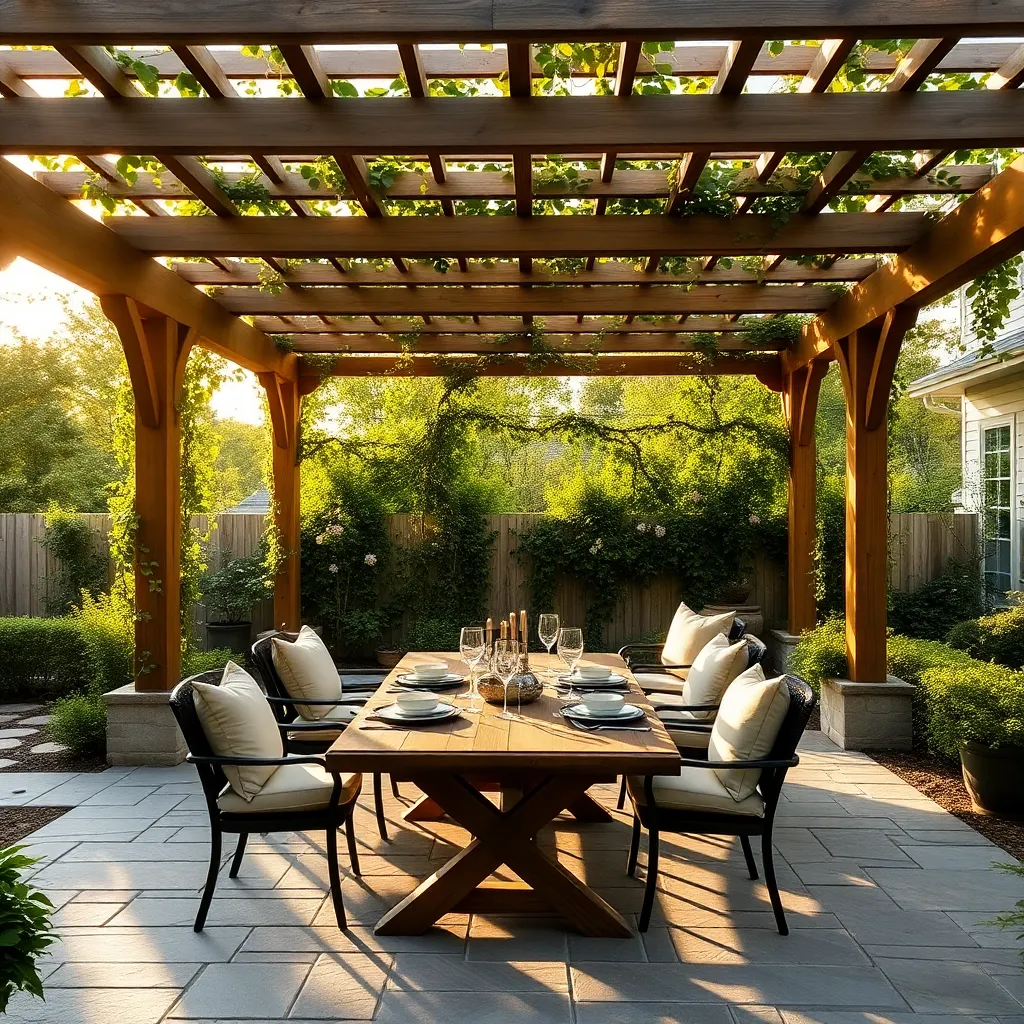
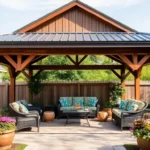
When crafting a classic pergola, start with selecting durable materials like cedar or pressure-treated wood, which offer both longevity and a timeless aesthetic. Aim for a structure that’s approximately 8 feet tall and 12 feet wide, providing ample space for gatherings and shade. Use 4×4 or 6×6 posts for sturdy support, and ensure they are anchored securely in concrete for stability. Beginners should focus on simple, straight lines, while more advanced DIYers can experiment with decorative elements like curved beams or lattice panels for added visual interest.
Adding design elements such as climbing plants can enhance the pergola’s appeal and provide natural shade over time. Consider incorporating vines like wisteria or grapevines, which thrive on pergolas and add a lush, inviting atmosphere. For a polished finish, use weather-resistant wood stains or paints that complement your outdoor space. Remember, precise measurements and level construction are crucial for a professional look, so take your time during assembly and use a spirit level to ensure accuracy. These techniques will help both beginners and experienced builders create a stunning, functional addition to any backyard.
Building a Budget-Friendly Sail Shade
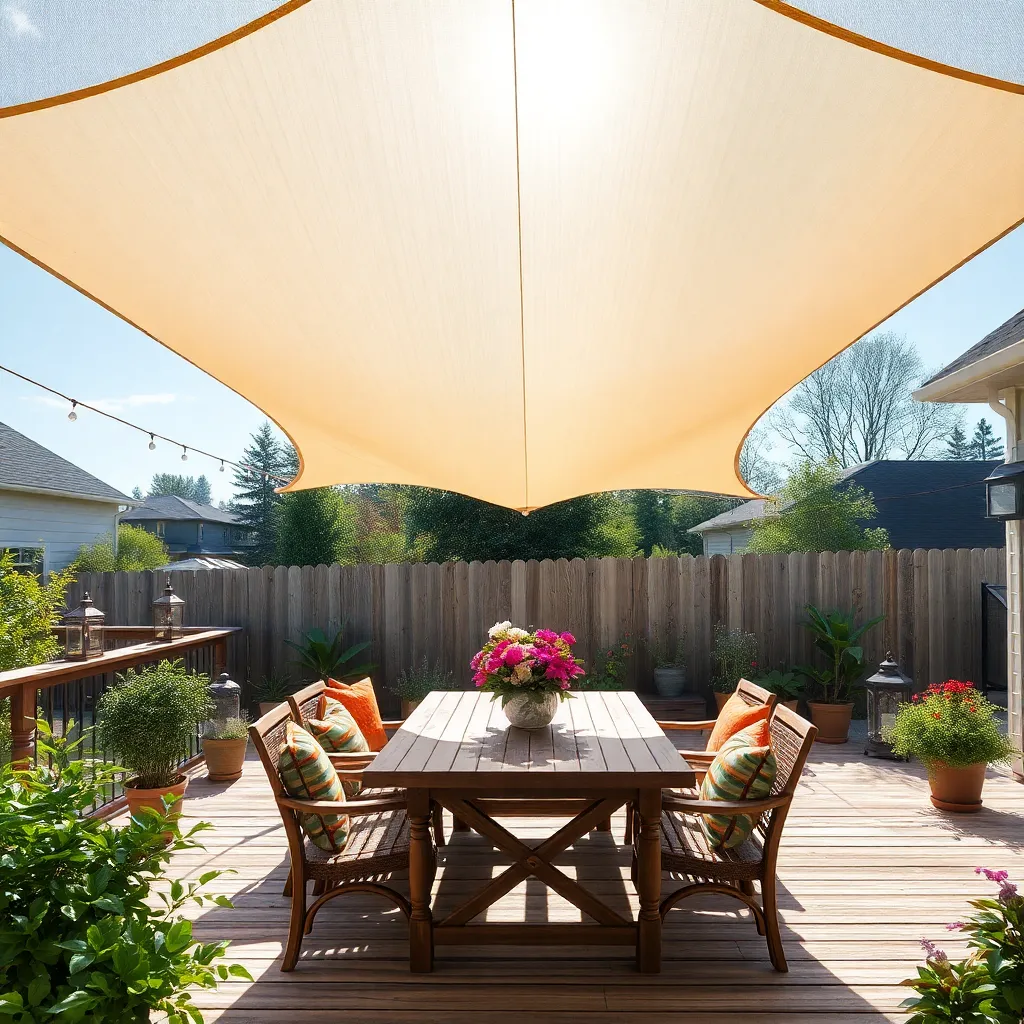
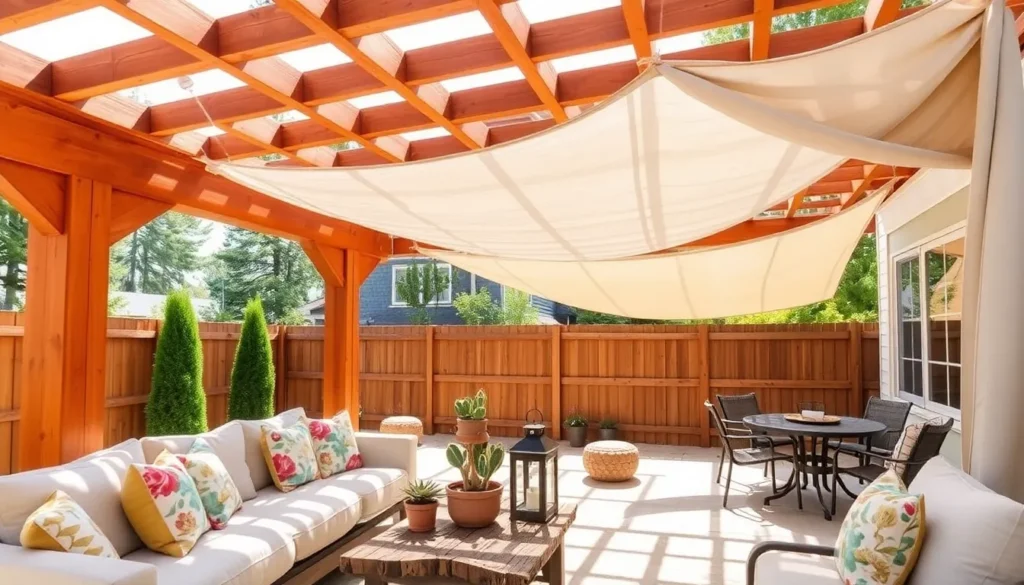
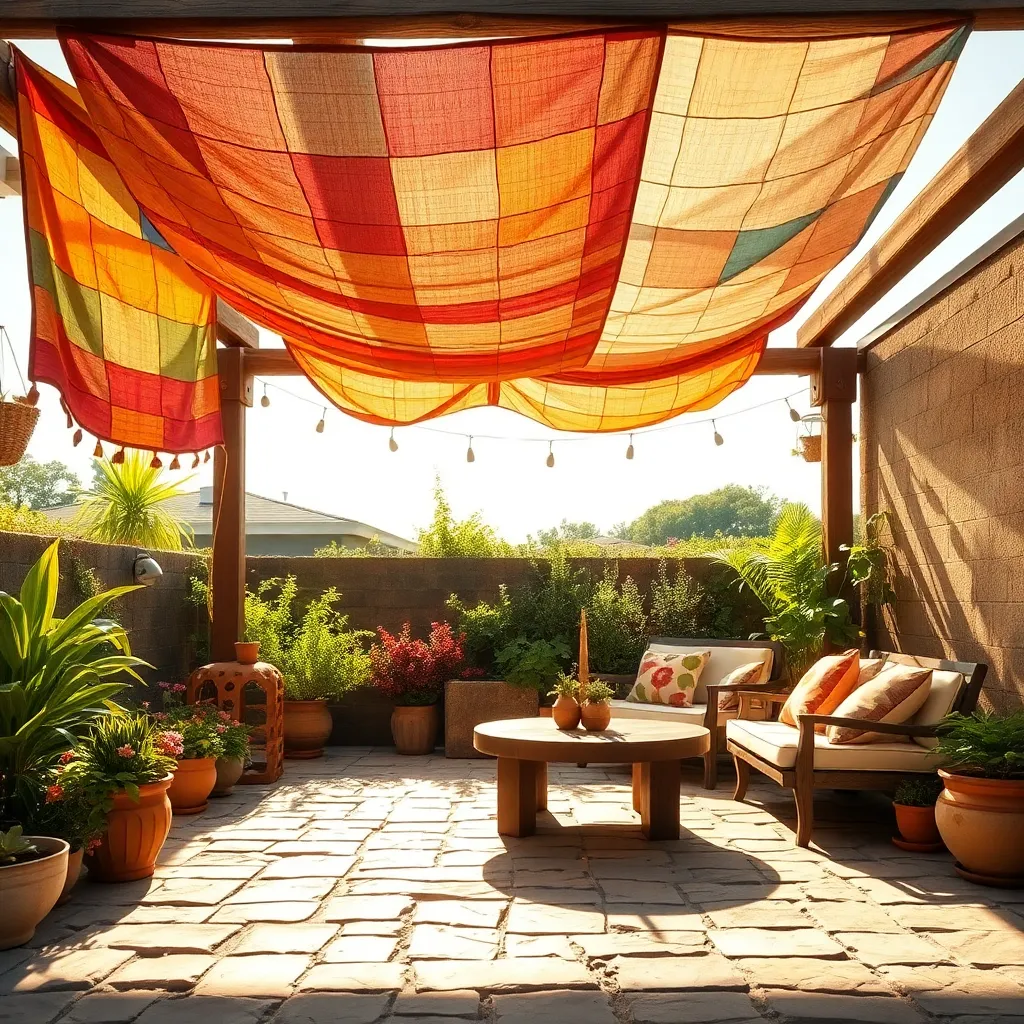
Transform your backyard into a cozy retreat with a budget-friendly sail shade. Start by selecting a durable fabric, such as UV-resistant polyethylene, which provides excellent sun protection and is easy to clean. For a beginner-friendly installation, choose a triangular or rectangular sail, as these shapes are easier to handle in small spaces. Secure the corners to sturdy anchor points like poles or trees using marine-grade rope or stainless steel hardware for a tight, professional look. This simple addition not only offers shade but also adds a modern touch to your outdoor living area.
For those looking to enhance their sail shade experience, consider layering multiple sails for a dynamic design that provides varied coverage throughout the day. When planning your layout, pay attention to the sun’s path and aim to cover high-use areas like seating or play spaces. Advanced DIYers can experiment with adjustable setups using turnbuckles, allowing for seasonal adjustments and improved tension control. These thoughtful touches ensure your sail shade remains a stylish and functional feature in your garden for years to come.
Constructing a Rustic Wooden Gazebo
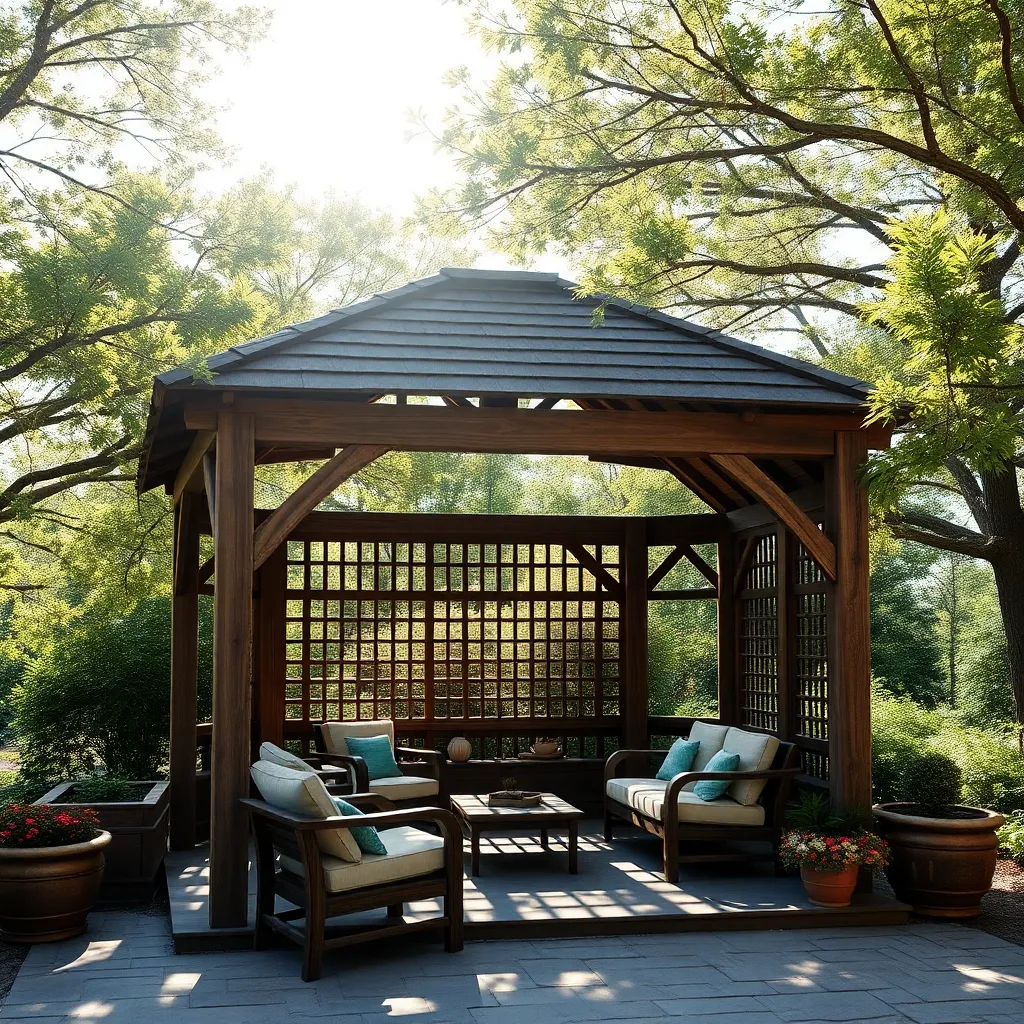
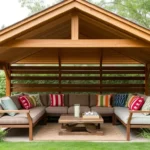
Creating a rustic wooden gazebo can transform your backyard into a tranquil retreat. Begin by selecting durable wood, such as cedar or redwood, which are known for their resistance to decay and insects. Focus on a simple yet sturdy design—a square or hexagonal shape is both classic and easy to construct. Use 4×4 posts for the structure’s corners, ensuring they are set in concrete for stability. For a charming touch, consider adding a slatted or lattice roof to allow dappled sunlight to filter through, creating a peaceful ambiance.
For those looking to add more flair, consider incorporating decorative elements such as carved post caps or a weathered finish to enhance the rustic aesthetic. Beginners can keep it straightforward by using pre-cut wood kits available at home improvement stores, while seasoned DIYers might enjoy crafting custom details. Ensure adequate space for relaxation by planning at least 10×10 feet for the base dimensions. To complete the cozy setting, add outdoor furniture and potted plants that complement your gazebo’s natural charm. With these steps, you’ll have a rustic haven to enjoy for years to come.
Installing a Retractable Awning System
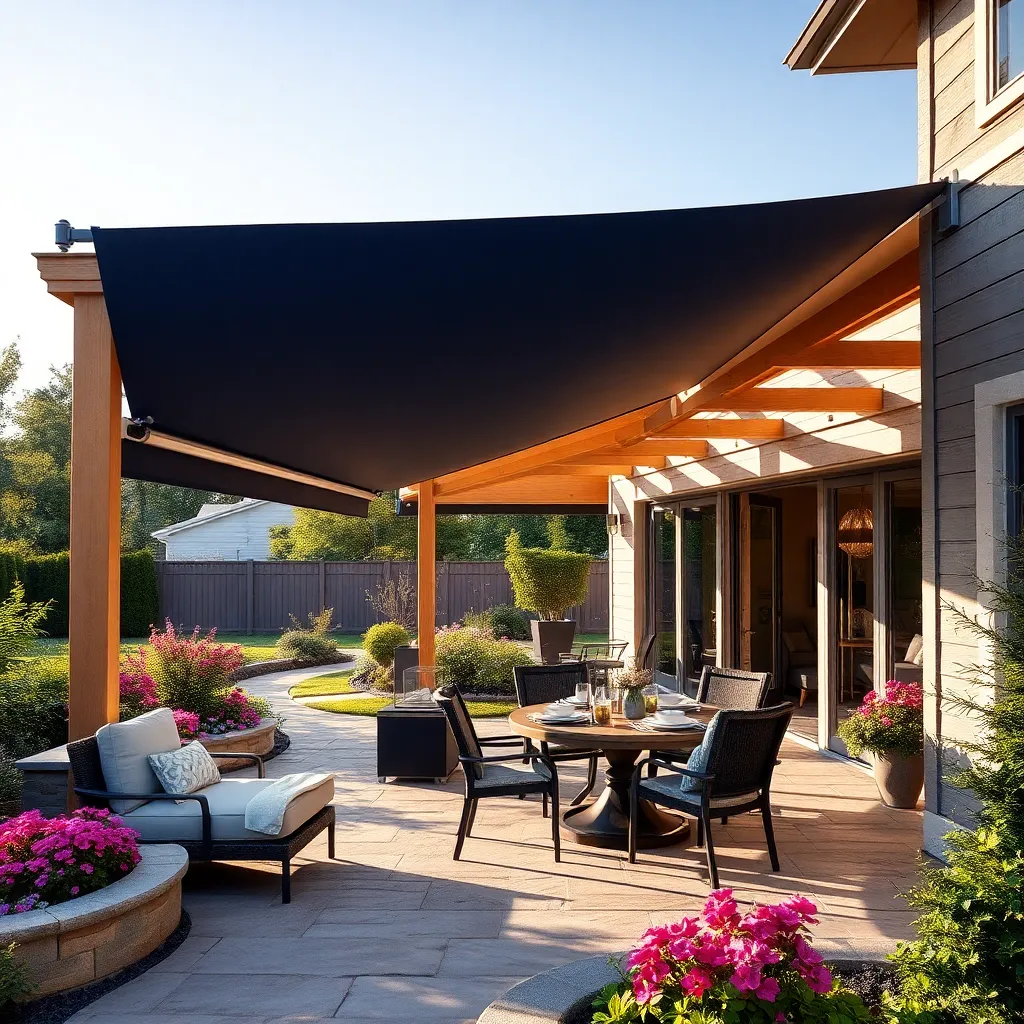
Enhancing your outdoor living space with a retractable awning system is a seamless way to enjoy shade on demand. Begin by measuring the area you wish to cover; a typical awning extends between 8 to 12 feet. Choose durable materials like aluminum or powder-coated steel for the frame and UV-resistant, waterproof fabric for the canopy. These materials ensure longevity and resilience against various weather conditions. For beginners, consider motorized systems for easy operation, while those with a knack for DIY can opt for manual retractable models.
When installing your awning, make sure it’s mounted to a sturdy surface, such as solid wood or brick, to support the weight and movement. Use lag bolts for a secure attachment and ensure the awning is slightly angled to facilitate water runoff. Advanced users might incorporate wind sensors to automatically retract the awning during strong gusts, preserving its integrity. Keep in mind local building codes and manufacturer instructions to avoid any structural issues. By following these steps, you’ll create a flexible, stylish shade solution that enhances comfort and outdoor enjoyment.
Designing a Vibrant Canopy Tent
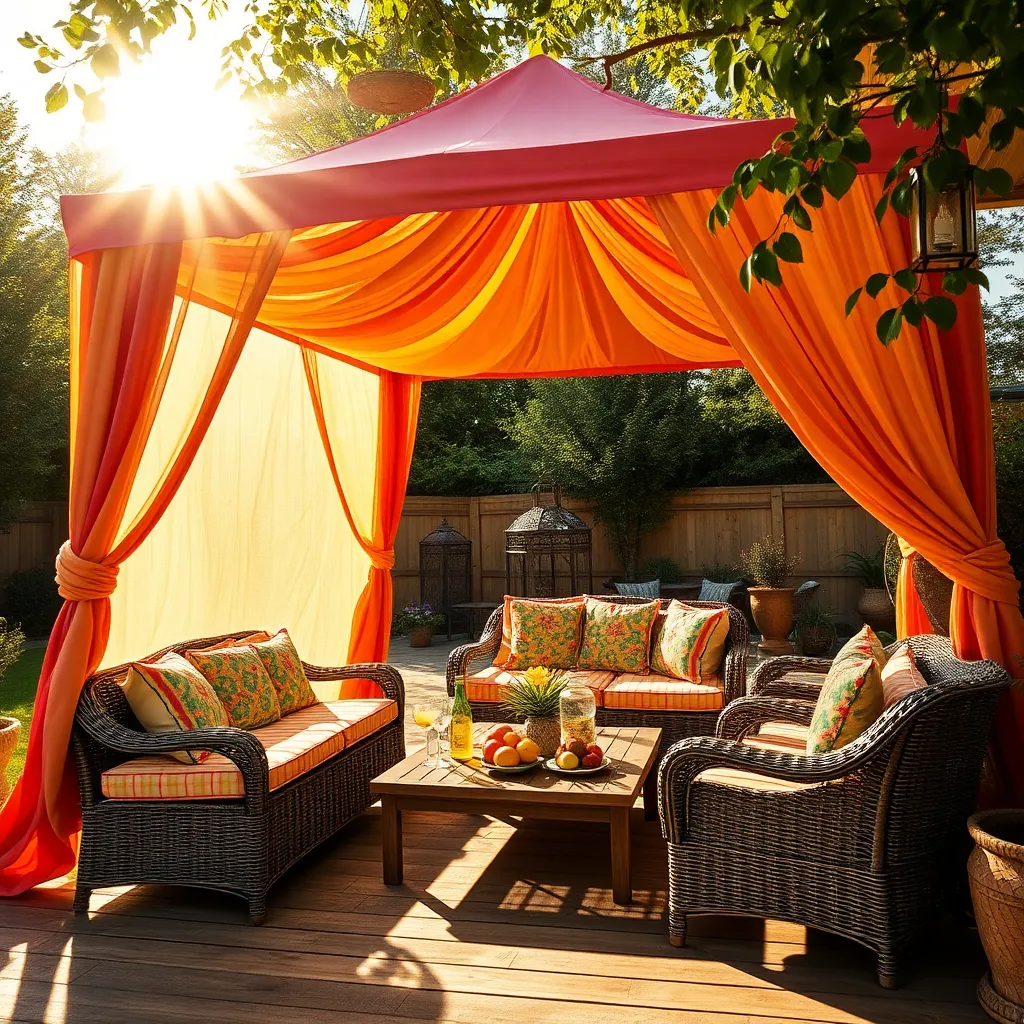
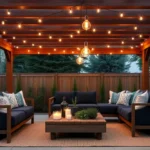
Creating a vibrant canopy tent for your backyard begins with selecting the right materials. Opt for a durable, weather-resistant fabric like Sunbrella or polyester to ensure longevity and protection from the elements. Choose bold, vibrant colors or patterns that complement your garden’s aesthetic to infuse energy into the space. For the structure, consider using lightweight aluminum or treated wood, which offers both stability and portability. Remember, the size of your canopy should be proportionate to your outdoor space—common dimensions like 10×10 feet are versatile and provide ample shade.
Adding personal touches can transform a basic canopy into a lively focal point. String outdoor LED lights or lanterns across the canopy for a charming evening ambiance. For advanced DIYers, incorporate curtain panels using waterproof fabric and attach them with Velcro or hooks for easy removal. This not only adds a decorative element but also provides additional privacy and wind protection. To ensure your canopy withstands windy conditions, secure it with stakes or weighted bags at each corner. With these design elements, your vibrant canopy tent will enhance your backyard’s functionality and style.
Erecting a Bamboo Shade Oasis
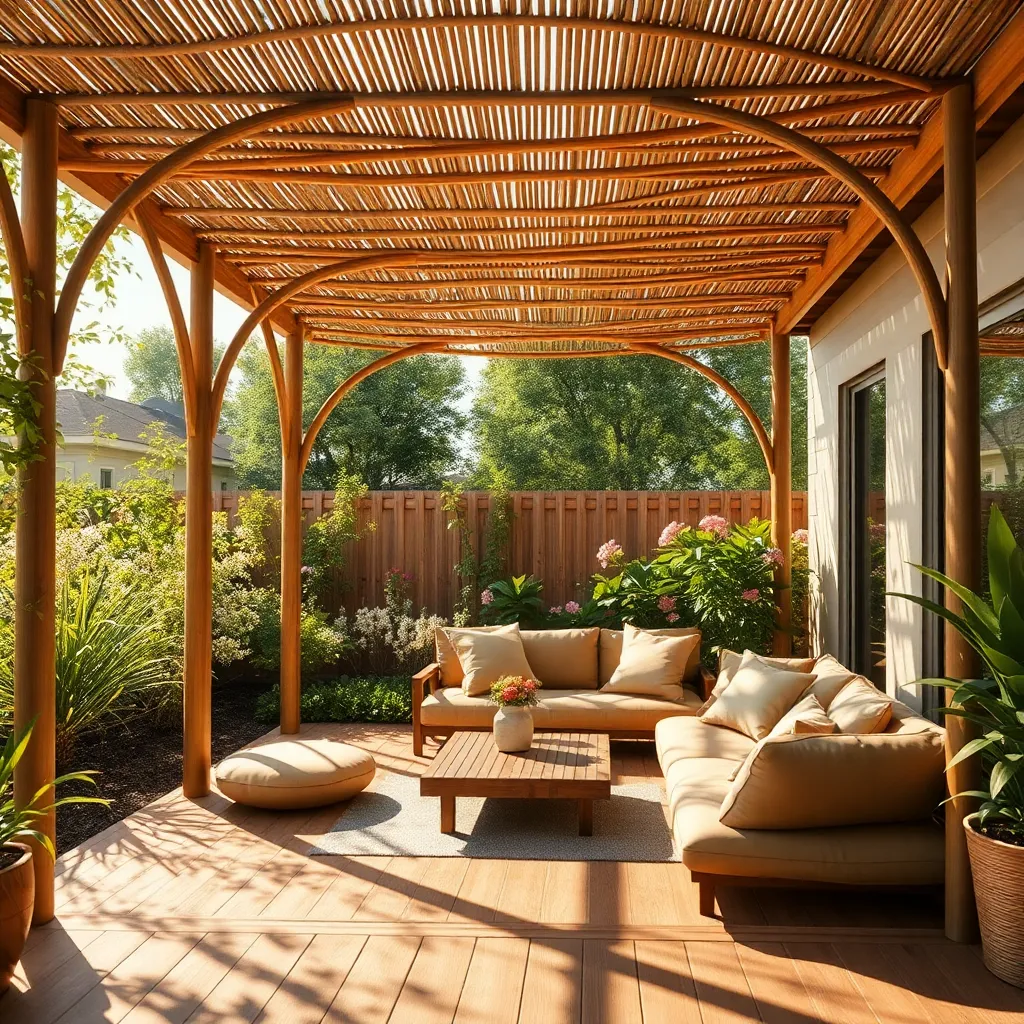
To create a serene bamboo shade oasis in your backyard, start by selecting sturdy bamboo poles, typically 10 feet in length, to form the structure’s frame. Arrange them in a square or rectangular layout based on your space, securing the poles at the corners with heavy-duty zip ties or metal brackets for stability. For added style and function, consider weaving smaller bamboo sticks horizontally across the top to create a natural, dappled shade effect that protects against the sun while maintaining an airy ambiance.
Once the frame is established, enhance your bamboo oasis with lush climbing plants like jasmine or wisteria, which can be trained to grow over the structure and provide additional cooling shade. For a more advanced touch, line the base with gravel or stone pavers to create a polished look, and install solar-powered fairy lights along the bamboo poles for a magical nighttime atmosphere. Remember, using weather-resistant sealant on the bamboo will help extend its life, ensuring your shade oasis remains a welcoming retreat for years to come.
Creating a Natural Leafy Shelter
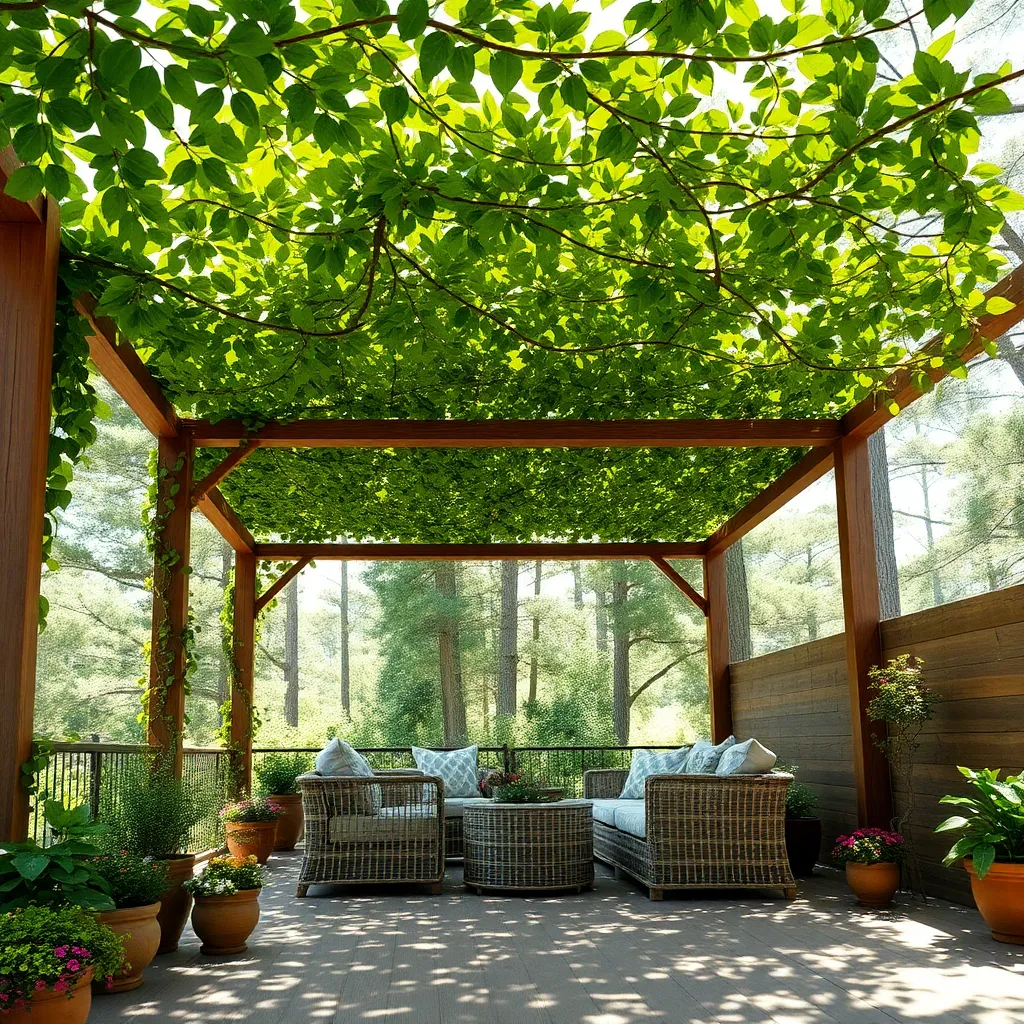
Creating a natural leafy shelter is a charming way to add shade and a touch of nature to your backyard. Start by selecting fast-growing, dense foliage plants such as wisteria, trumpet vine, or honeysuckle, which can be trained over a sturdy framework. Construct a simple frame using pressure-treated wood or rust-resistant metal poles for durability. Ensure the structure is strong enough to support the weight of mature plants. Beginners should begin with a basic rectangular frame, while seasoned gardeners might enjoy experimenting with arched or domed designs.
To enhance the leafy canopy effect, install a lattice or wire mesh along the top of the frame, allowing climbing plants to weave through naturally. Securely anchor the framework into the ground to withstand wind and weather. Space plants about 18 to 24 inches apart for optimal growth and coverage. For those looking to push their design further, consider incorporating hanging planters or pots with cascading plants to add layers of texture and depth. Regular pruning and training will ensure a lush, green retreat that evolves beautifully with each season.
Assembling a Portable Umbrella Station
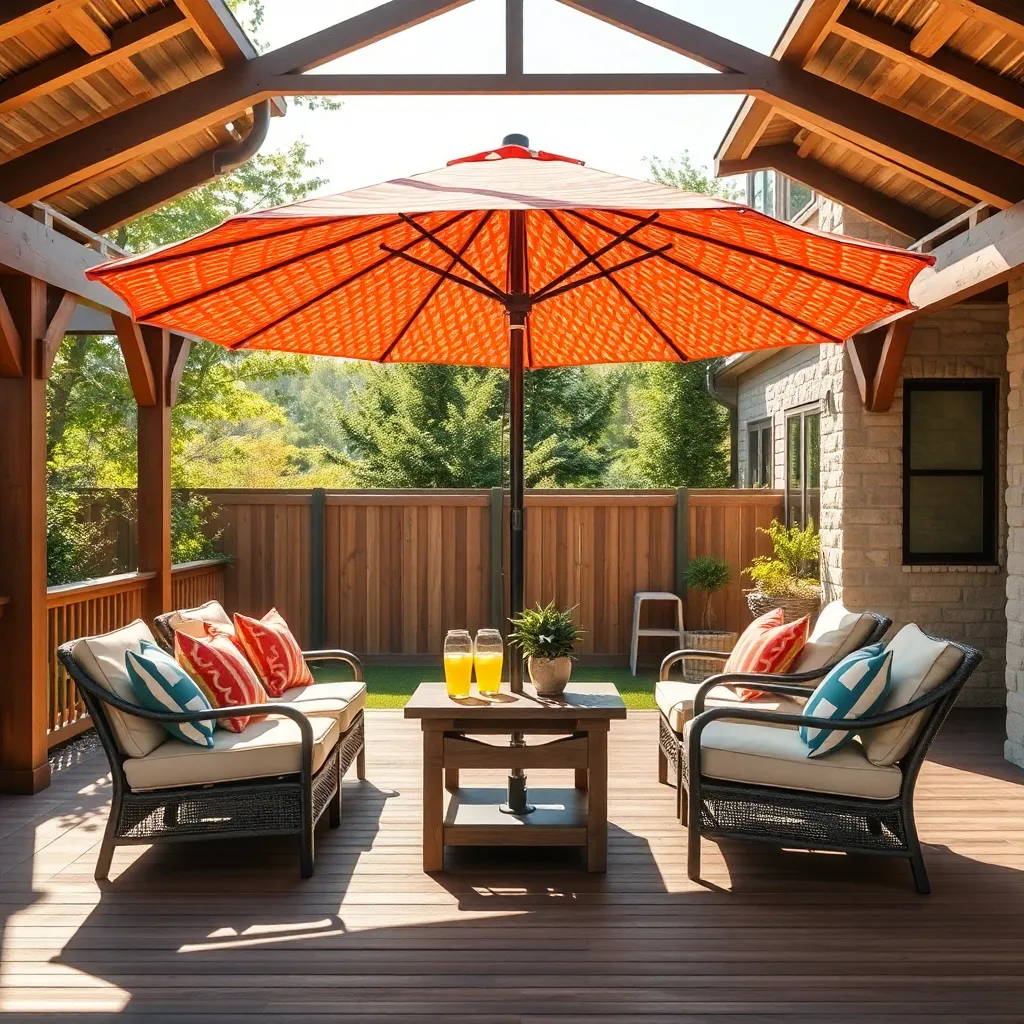
One of the simplest ways to create shade in your backyard is by assembling a portable umbrella station. Begin by selecting a sturdy base—typically made of metal or heavy-duty plastic—that can withstand wind and weather conditions. Choose an umbrella with a UV-resistant fabric and a tilting mechanism to adjust the angle of shade as the sun moves. For added stability, consider using sandbags or weighted bags around the base, especially if you live in a particularly windy area.
Position your umbrella station in a location that maximizes its shade coverage during peak sunlight hours. Ensure the area is level and free from debris for the most stable setup. For a touch of sophistication, consider an umbrella with built-in LED lights for evening gatherings. Advanced gardeners might install a small, decorative trellis nearby, allowing climbing plants to enhance the aesthetic and provide additional natural shade. This straightforward project offers both immediate functionality and the flexibility to move your shade solution as needed.
Innovating with Upcycled Fabric Covers
Using upcycled fabric for shade covers is an eco-friendly way to create stylish and functional outdoor shelters. Start by sourcing durable, weather-resistant fabrics such as old sailcloth, canvas drop cloths, or even large pieces of denim. Measure your space to determine the size of the fabric needed, and cut it to fit, ensuring it provides ample coverage while allowing airflow. For added flair, sew on colorful patches or patterns using fabric scraps, creating a unique design that reflects your personal style.
For installation, you can use a simple rope and grommet system to secure the fabric. Punch grommets along the edges of the fabric and thread a strong, UV-resistant rope through them. Anchor the ropes to sturdy points like trees, fences, or poles to create a taut, stable structure. For those with advanced skills, consider incorporating a pulley system for easy adjustment of shade angles throughout the day. By transforming old materials into creative covers, you not only save money but also contribute to a more sustainable environment.
Designing a Lattice-Style Sunbreaker
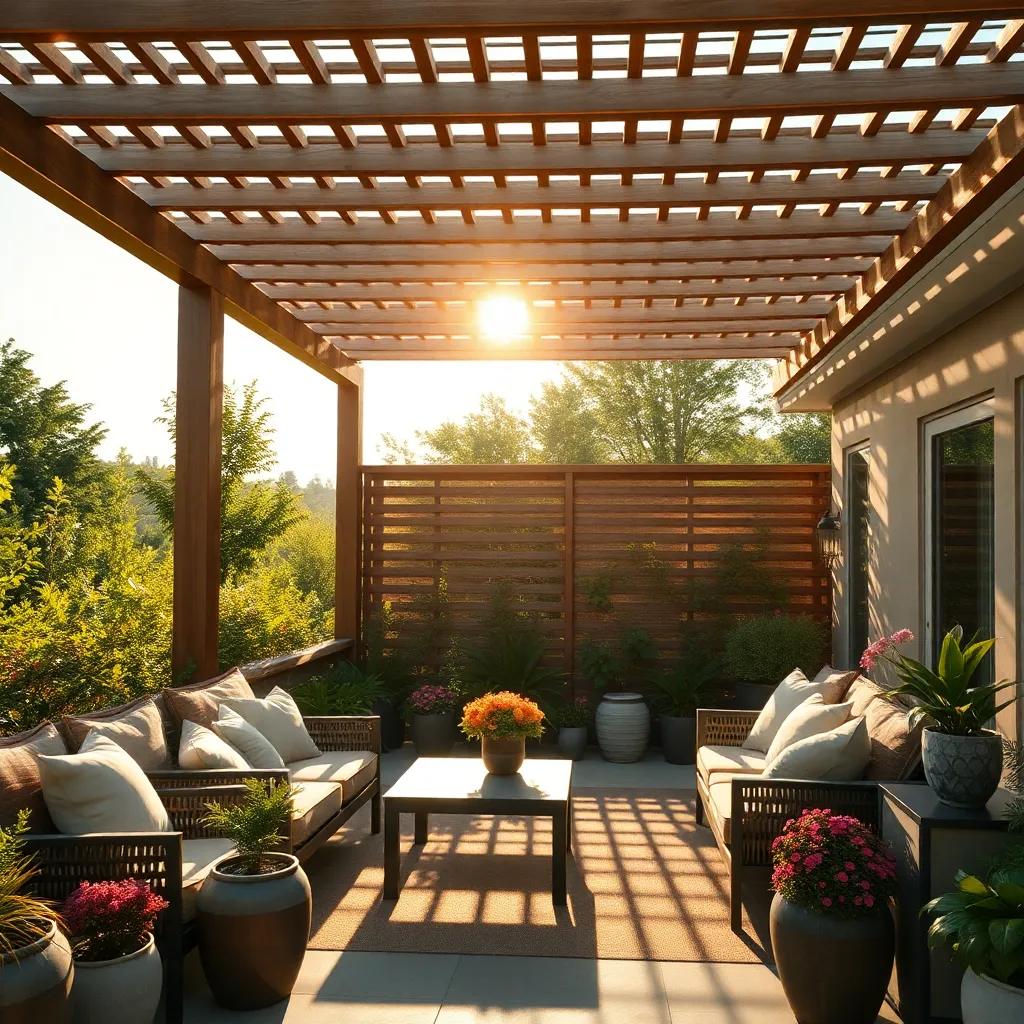
Transform your backyard into a serene retreat by designing a lattice-style sunbreaker that blends functionality with aesthetic appeal. Start by selecting durable materials like cedar or redwood, which offer both longevity and natural beauty. Cut lattice panels to your desired dimensions, typically 4×8 feet, and secure them between sturdy posts anchored into the ground. These panels not only provide shade but also allow dappled light to enhance your outdoor space while maintaining good airflow.
For those seeking a more advanced touch, consider incorporating climbing plants such as wisteria or jasmine, which can wind through the lattice for added shade and visual interest. Regular pruning will ensure the plants do not overwhelm the structure. To enhance stability, use galvanized screws and brackets, particularly in areas prone to strong winds. With these tips, you can create a personalized sunbreaker that elevates both the style and comfort of your backyard.
Incorporating Natural Vines for Shade
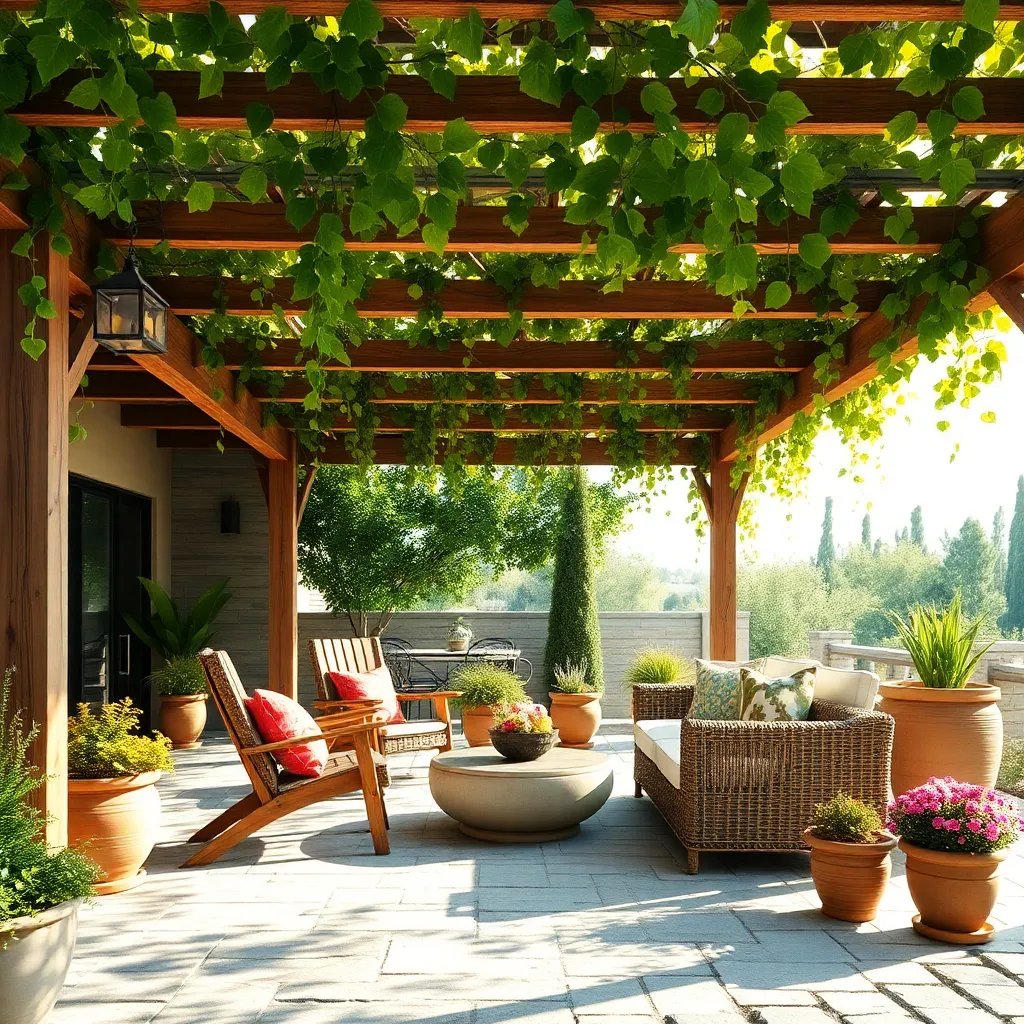
Incorporating natural vines for shade not only enhances the aesthetic of your outdoor space but also provides a sustainable solution for cooling. Start by selecting fast-growing, hardy vines such as Wisteria, Clematis, or Honeysuckle, which thrive in various climates. Construct a simple trellis using weather-resistant materials like cedar or treated wood, ensuring a height of at least 6-8 feet for optimal coverage. This structure will support the vines as they grow and spread, forming a lush, green canopy.
To encourage vigorous growth, plant your chosen vines in nutrient-rich soil with good drainage, and water them regularly, especially during dry spells. For more advanced gardeners, consider intertwining multiple vine varieties to create a tapestry of colors and textures. Prune regularly to maintain shape and prevent overgrowth, ensuring your shelter remains both functional and beautiful. This natural approach not only offers effective shade but also attracts pollinators, enhancing the biodiversity of your backyard.
Conclusion: Creating Beautiful Outdoor Spaces
As we’ve explored in ’11 DIY Shade Structures for Your Backyard’, each structure represents a unique opportunity to enhance your outdoor space, much like nurturing the diverse aspects of a flourishing relationship. From the intimacy of a pergola to the versatility of a sail shade, these structures echo key relationship concepts: trust, communication, adaptability, creativity, support, intimacy, growth, harmony, resilience, balance, and commitment.
Now, take immediate action—choose one DIY project that resonates with you and your partner. Collaborate in its creation, using this shared endeavor to strengthen your bond. As you work together, reflect on how these structures symbolize the foundational elements of your relationship.
Remember, great relationships, like backyard sanctuaries, are built with intention and care. Bookmark this article to revisit these concepts and draw inspiration whenever your relationship could use a refreshing boost. By consistently investing in your connection, you’ll pave the way for sustained relationship success, creating an enduring partnership as sturdy and welcoming as any shade structure. Together, let’s build relationships that stand the test of time, filled with love, laughter, and shared achievements.