Imagine stepping into your backyard and being greeted by the serene elegance of a pergola, transforming your outdoor space into a personal sanctuary. “12 DIY Pergola Ideas for a Stunning Backyard” is your gateway to creating this enchanting escape, whether you’re just dipping your toes into DIY projects or you’re a seasoned backyard architect. With a few tools and a splash of creativity, you can elevate your outdoor living from ordinary to extraordinary.
In this guide, you’ll discover a variety of pergola styles that cater to every taste and skill level, promising both aesthetic beauty and functional benefits. From creating shaded retreats for tranquil afternoons to crafting inviting spaces for entertaining guests, these projects will not only boost your confidence but also increase the value and enjoyment of your home. So roll up your sleeves! With our practical tips and inspiring ideas, transforming your backyard into a stunning oasis is within your reach.
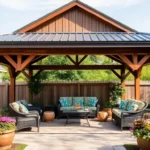
Select Durable Wood for Structure
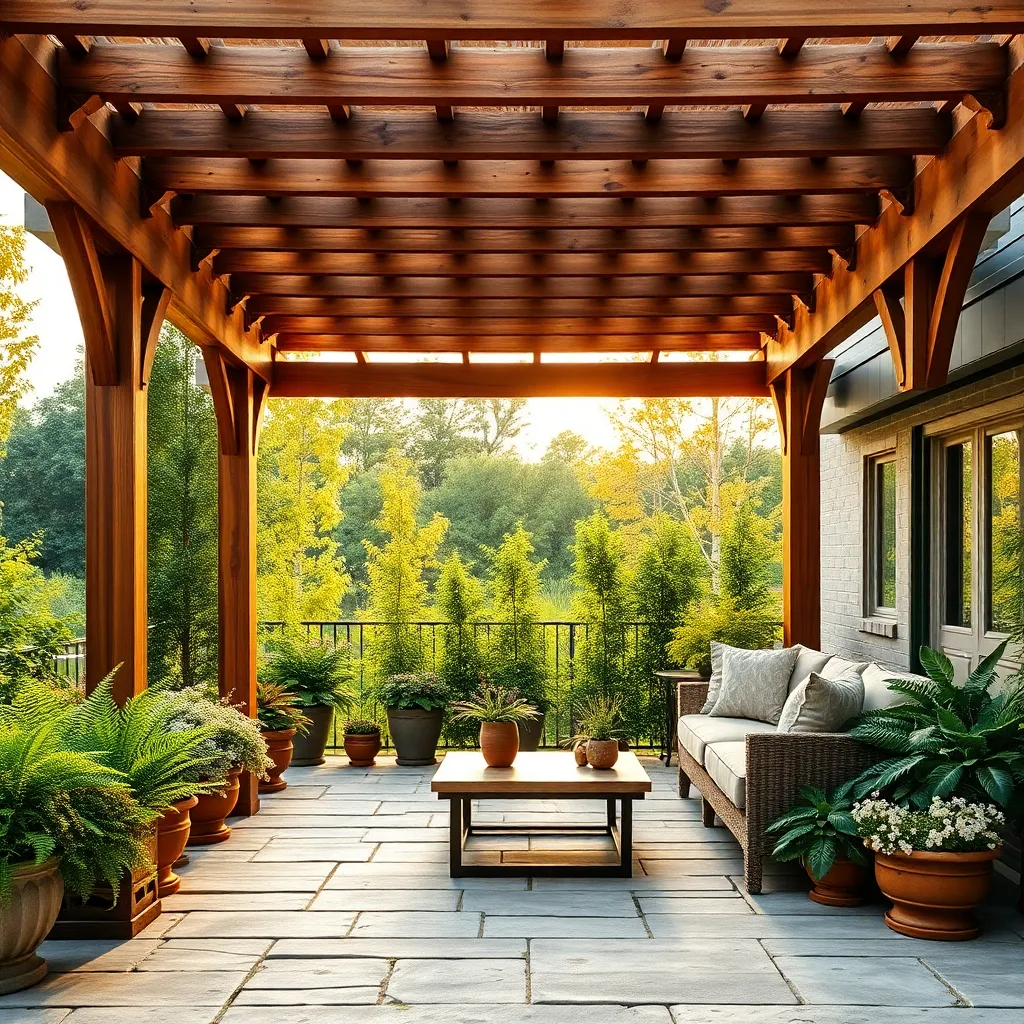
When selecting wood for your pergola, focus on durability and resistance to weather. Cedar and redwood are excellent choices due to their natural resistance to rot and insects, making them ideal for outdoor structures. If you’re on a budget, pressure-treated pine is a cost-effective alternative with similar protective qualities, although it may require more maintenance over time.
For a more refined finish, consider using hardwoods like ipe or teak, which are known for their strength and longevity. These woods are denser and offer a sophisticated appearance but can be challenging to work with due to their weight and hardness. Whichever wood you choose, ensure it’s properly sealed and treated to extend its lifespan and maintain its beauty against the elements.
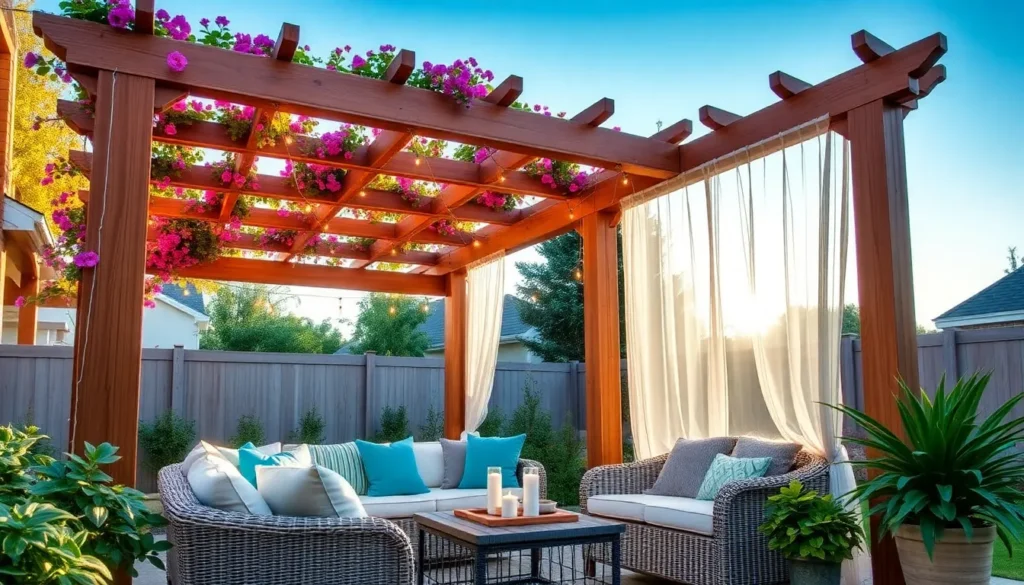
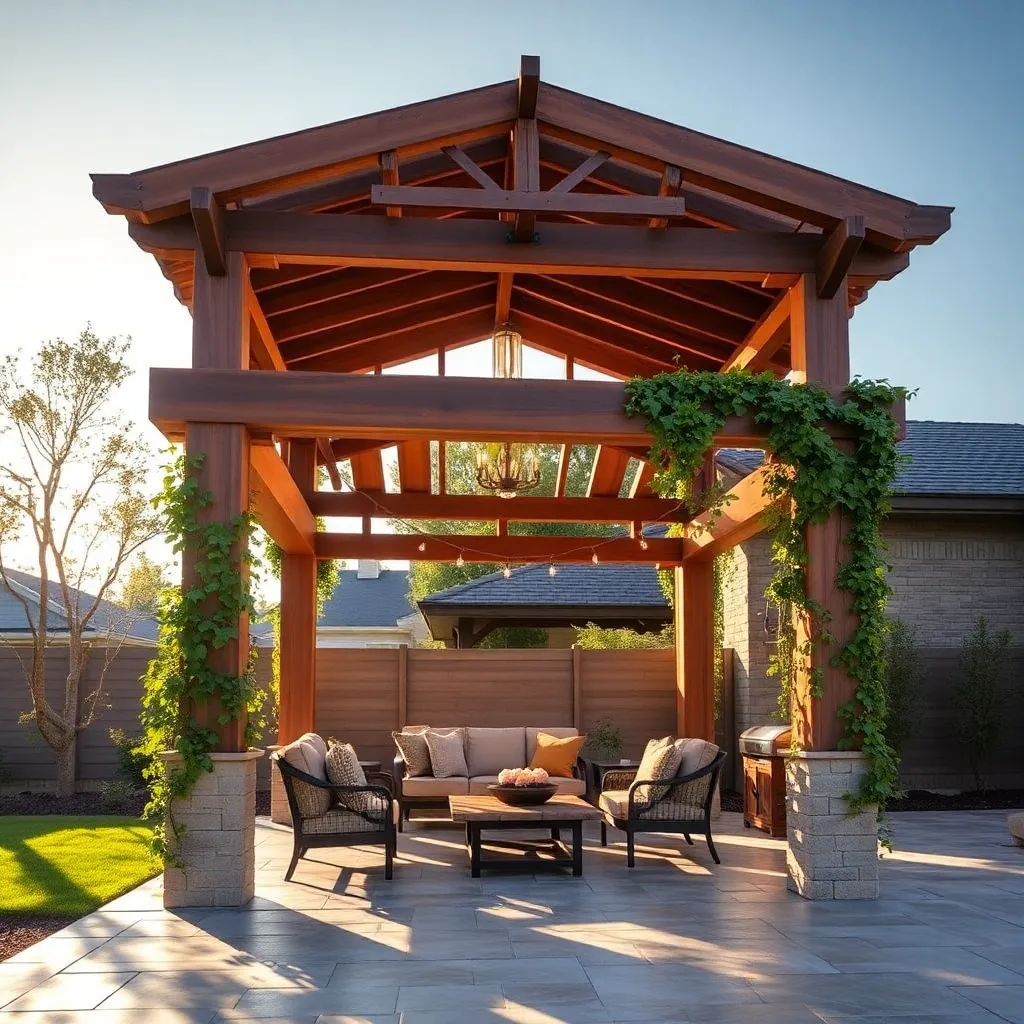
Incorporate Climbing Plants for Shade
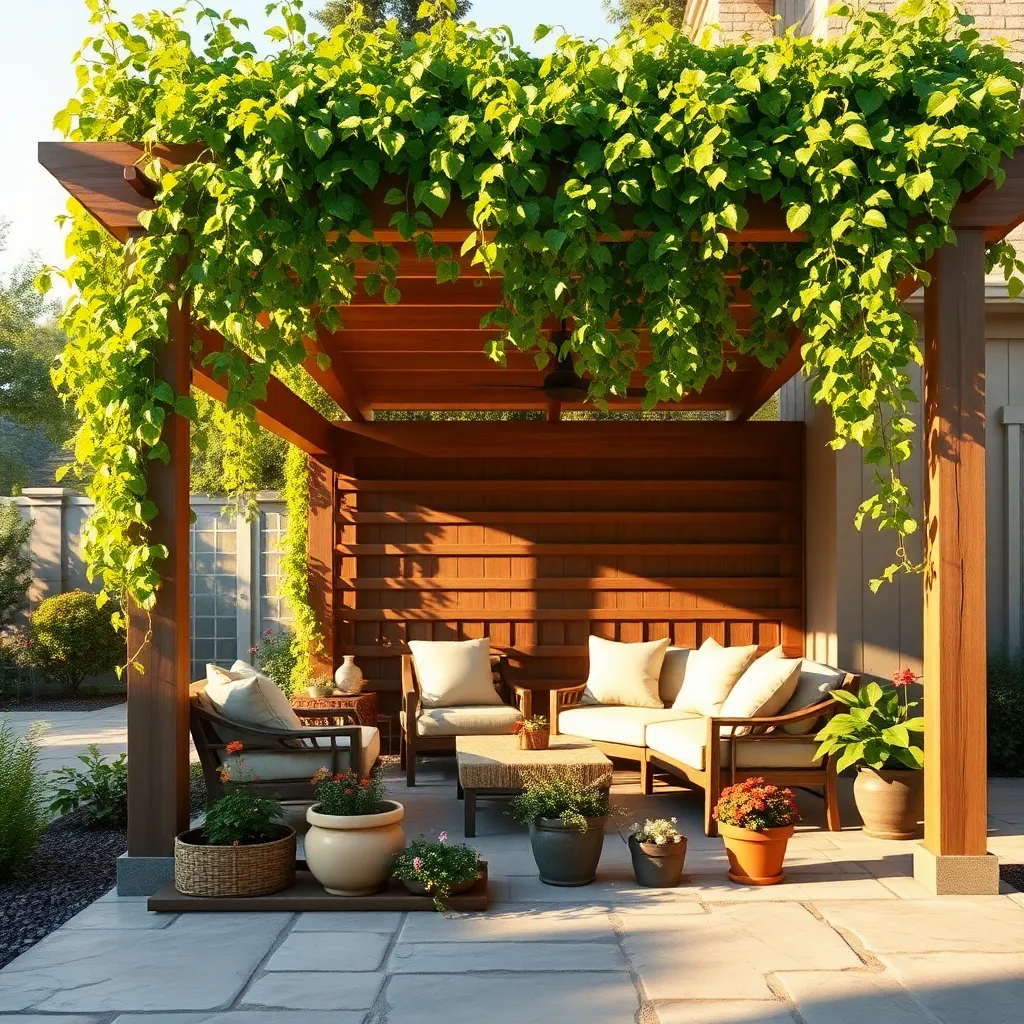
Enhancing your pergola with climbing plants not only adds beauty but also provides natural shade. Consider starting with fast-growing species like clematis or honeysuckle, which are beginner-friendly and thrive in various climates. Use sturdy trellises or wire to guide the plants as they grow, ensuring they cover the pergola overhead. For an advanced touch, choose perennials that bloom at different times for year-round appeal.
To support your climbing plants, opt for materials like stainless steel wires or a lattice made from treated wood, ensuring longevity and stability. Space the supports about 12 inches apart to allow easy climbing and coverage. For those looking to maximize shade, plant at least two climbers per post, and regularly prune to encourage dense growth. This approach will transform your pergola into a lush, green oasis that offers both shade and a touch of elegance.
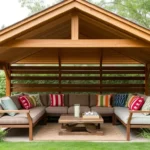
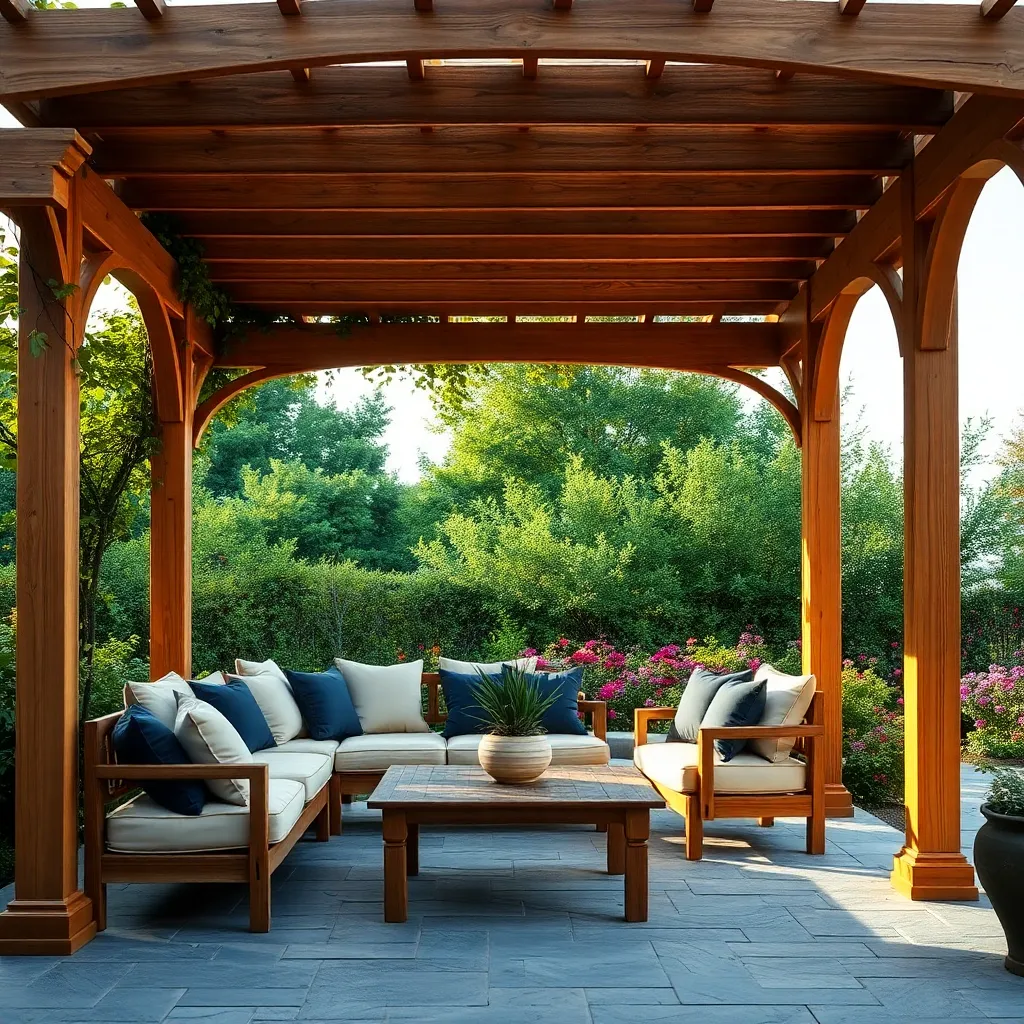
Add Built-In Seating Options
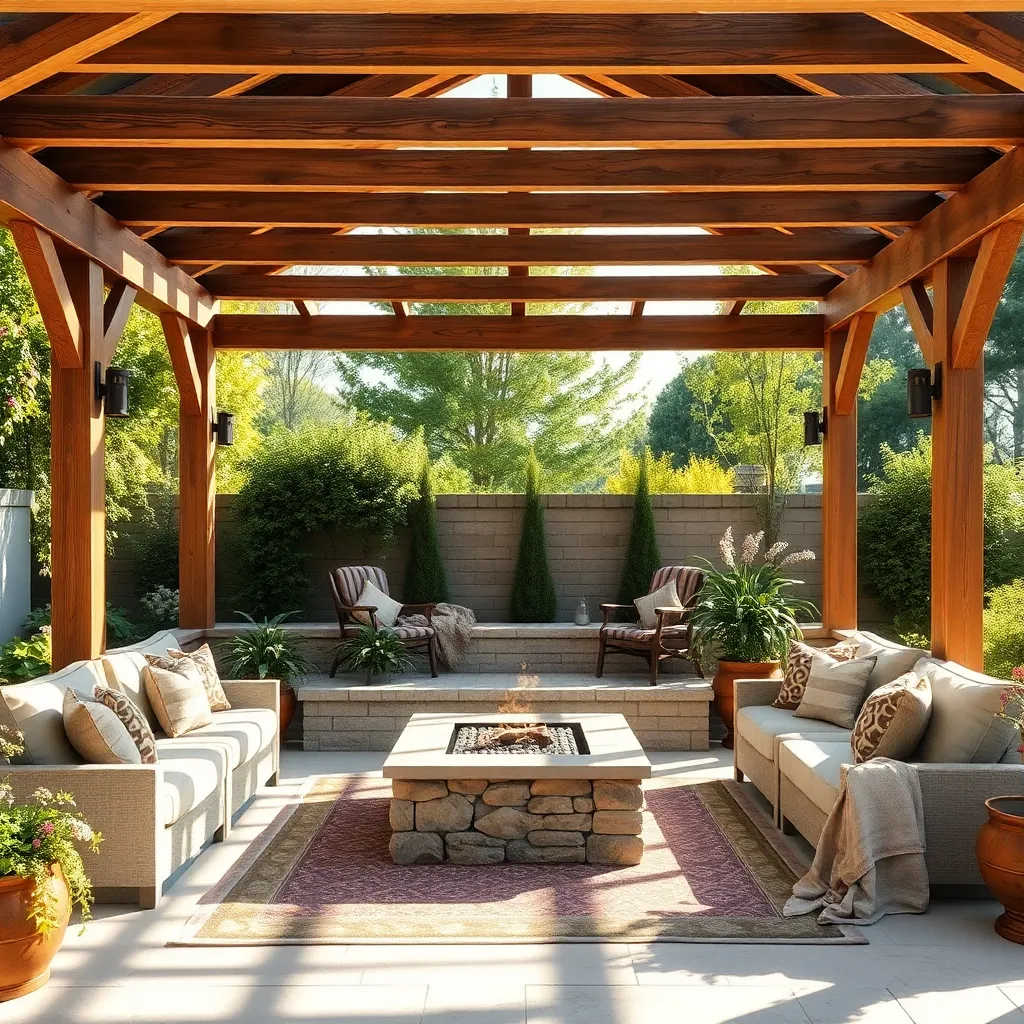
To enhance the functionality and comfort of your pergola, consider adding built-in seating options. This not only saves space but also creates a cohesive design element. Start with simple, sturdy materials like pressure-treated wood or composite decking, which are both durable and weather-resistant. If you’re new to DIY, opt for a basic bench design with straight lines and minimal cuts. For a more refined look, experienced builders might incorporate curved seating or built-in storage beneath the benches for cushions and garden tools.
When planning your seating, measure the area to ensure ample legroom and consider incorporating a backrest for added comfort. A depth of 18-20 inches is ideal for most seating, while a height of 16-18 inches provides a comfortable perch. To personalize your seating, choose cushions in weather-resistant fabrics or add decorative touches like throw pillows. For additional flair, install built-in planters at the ends of the benches to seamlessly blend nature with your seating arrangement, enhancing the overall aesthetic of your outdoor space.
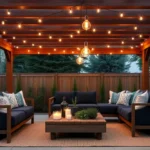
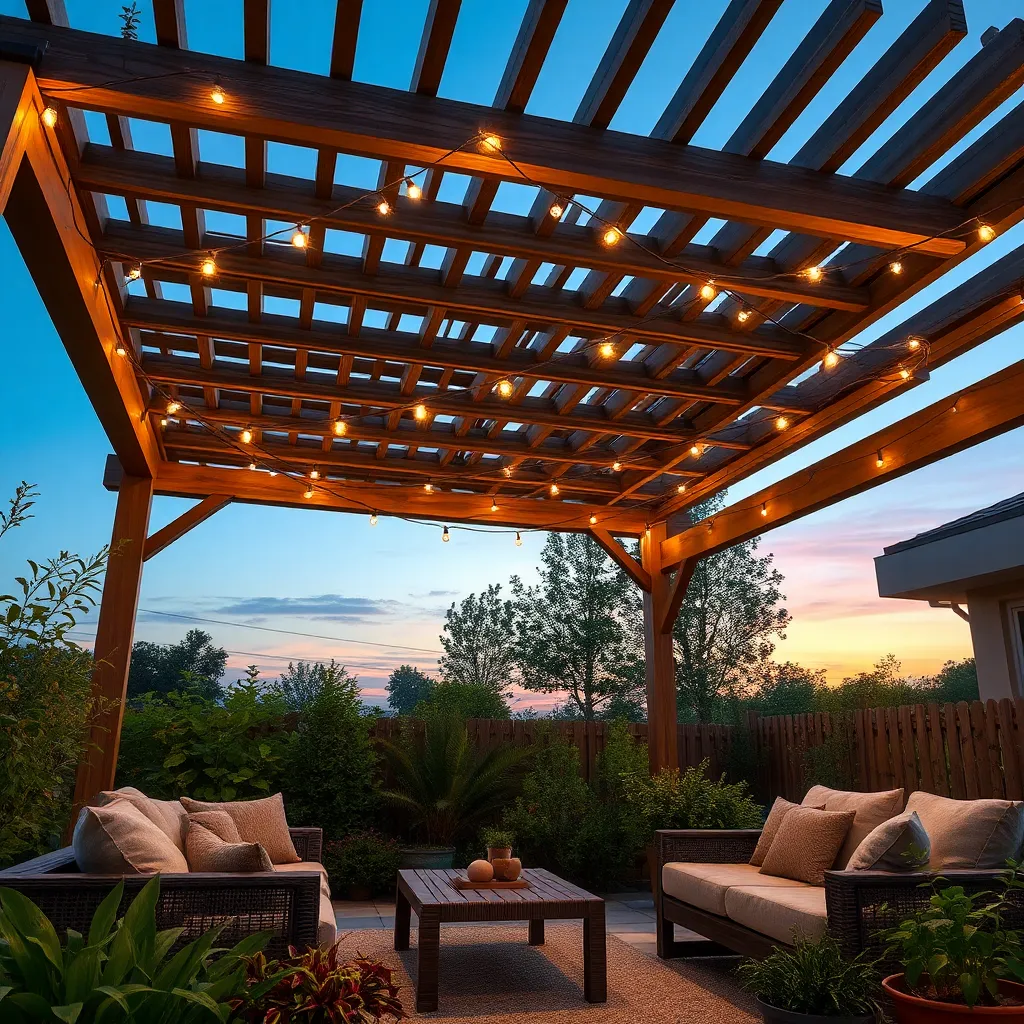
Utilize String Lights for Ambiance
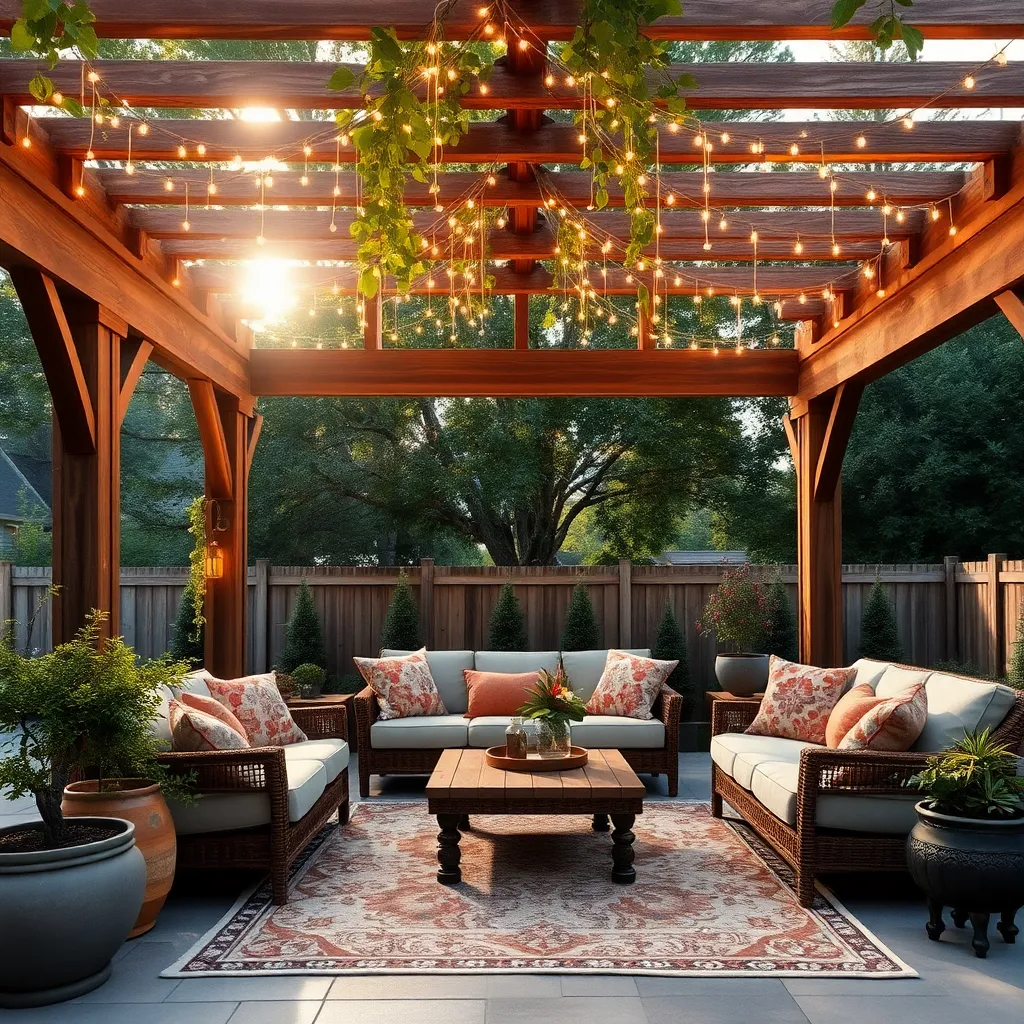
Transform your pergola into a magical retreat by incorporating string lights for ambiance. Begin by selecting weather-resistant LED string lights, which are energy-efficient and durable for outdoor use. Secure the lights along the beams or weave them through the lattice roof to create a soft, inviting glow. For a more advanced touch, consider using dimmable lights or those with smart controls to adjust the brightness and color to suit the occasion.
To achieve a professional look, use stainless steel hooks or clips to evenly space the lights, ensuring they are both secure and aesthetically pleasing. For a beginner-friendly option, try stringing the lights in a simple zigzag pattern across the top of the pergola. Advanced DIYers might opt to integrate solar-powered lights to eliminate the need for electrical outlets, providing an eco-friendly solution. This simple addition not only enhances the visual appeal but also extends the usability of your outdoor space into the evening hours.
Install Retractable Canopy Covers
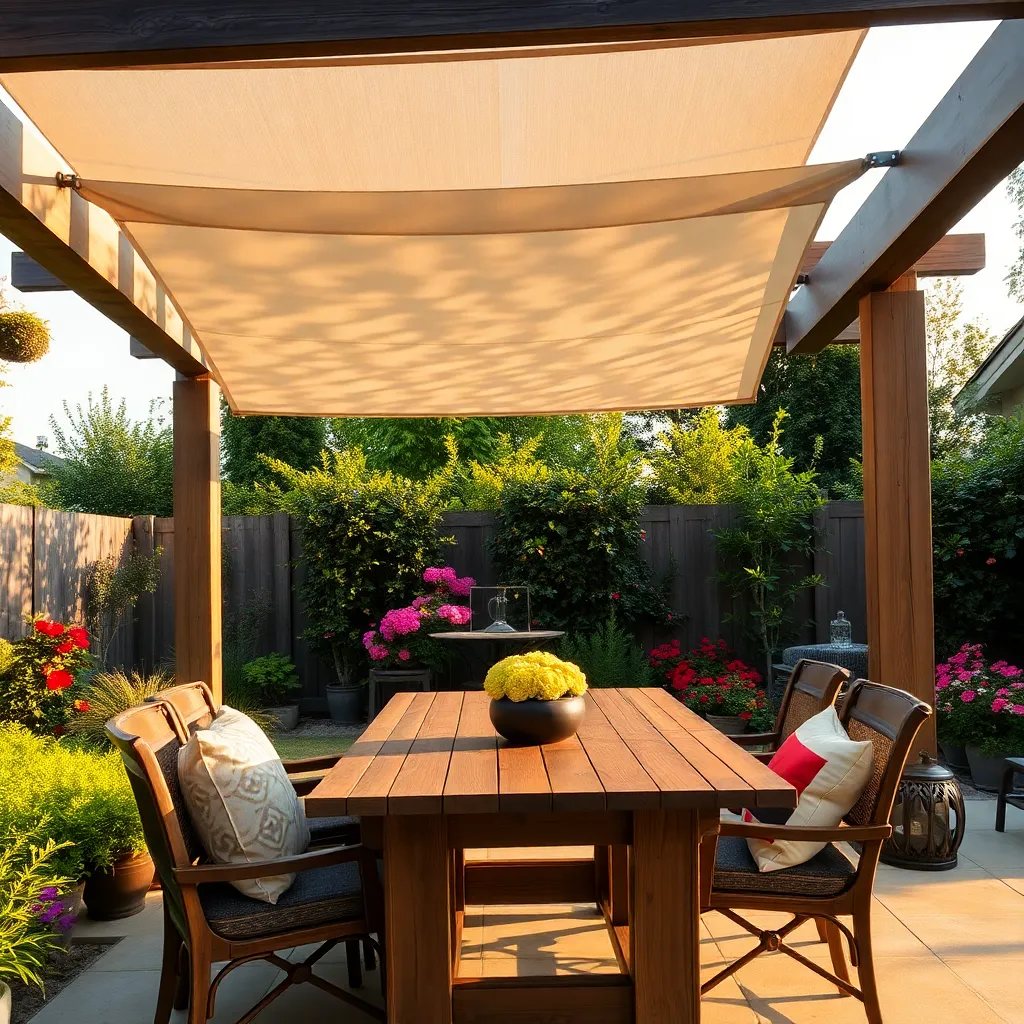
Installing retractable canopy covers can transform your pergola into a versatile outdoor haven. These covers provide excellent protection from the elements, allowing you to enjoy your space regardless of the weather. For beginners, opt for a fabric canopy made from durable, UV-resistant materials like acrylic or polyester. These materials are easy to clean and maintain, ensuring your pergola remains attractive for years to come. For a more advanced setup, consider a motorized retractable system, which offers convenience at the push of a button and integrates seamlessly with smart home controls.
Start by measuring your pergola’s dimensions to ensure a snug fit for the canopy. Most retractable systems are customizable, so take advantage of this feature to get the perfect size. Ensure the mounting brackets are securely attached to the pergola’s beams to withstand wind and weather. For DIY enthusiasts, many kits come with all necessary components and detailed instructions, making installation straightforward. To enhance the aesthetic appeal, choose a canopy color that complements your outdoor decor, and consider adding side curtains for extra privacy and shade control.
Craft a Curved Pergola Design
Creating a curved pergola adds a unique and elegant touch to your backyard, seamlessly enhancing its aesthetic appeal. For a basic structure, use pressure-treated wood or cedar, known for their durability and resistance to weather. Beginners can start with a simple arch using pre-bent pergola kits available at most home improvement stores. Ensure the curved beams are securely anchored to prevent any structural issues later. For more advanced builders, consider bending your own beams using a steam box or kerf bending technique to achieve custom curves.
Incorporating design elements like lattice sides or climbing plants can further elevate your pergola’s charm. For a lush, green canopy, choose fast-growing vines like wisteria or jasmine. When choosing dimensions for your pergola, ensure it’s large enough to comfortably accommodate seating or dining areas but not so large that it overwhelms your space. Standard dimensions often range from 10×10 feet to 12×12 feet, but always tailor the size to your specific needs and backyard layout. With these tips, you can create a stunning focal point that combines functionality with visual interest, inviting you to enjoy your outdoor space more than ever.
Use Lattice Panels for Privacy
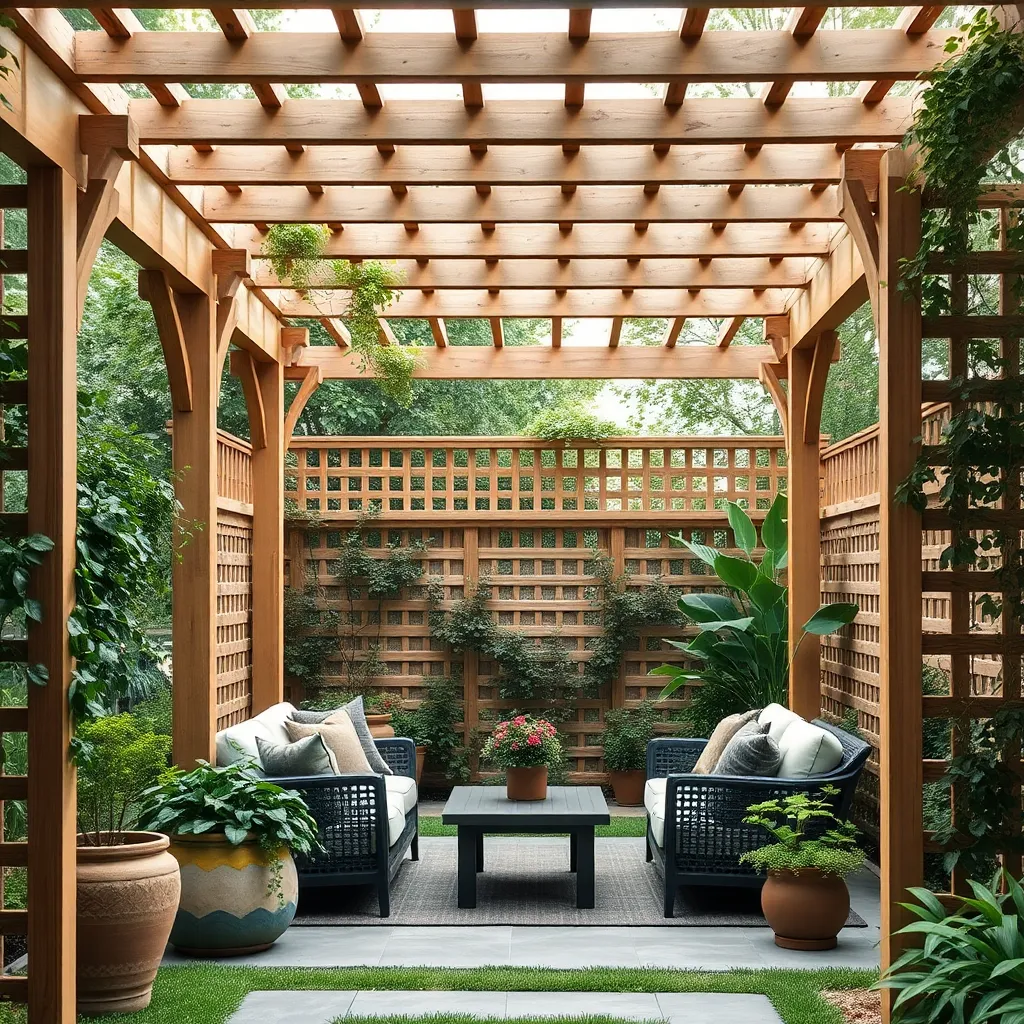
Integrating lattice panels into your pergola can significantly enhance privacy while adding a touch of elegance. Lattice panels are versatile and can be customized to fit any pergola design, providing a semi-transparent barrier that allows airflow while blocking direct views. For beginners, opt for pre-made wooden or vinyl lattice panels, which are easy to install and readily available at most home improvement stores. Simply attach them to the sides of your pergola using sturdy brackets or screws, ensuring each panel is securely fastened.
For those looking to add a personal touch, consider painting or staining the lattice to complement your outdoor décor. Choose colors that blend seamlessly with your existing landscape, or go bold with a contrasting hue for a modern twist. Advanced DIY enthusiasts might explore creating custom lattice patterns with varying slat widths for a unique design. When planning the installation, ensure your lattice panels are at least 6 feet tall to provide adequate privacy while maintaining an open feel. This functional addition not only increases seclusion but also offers a perfect backdrop for climbing plants, elevating the aesthetic appeal of your backyard oasis.
Enhance with Hanging Planters
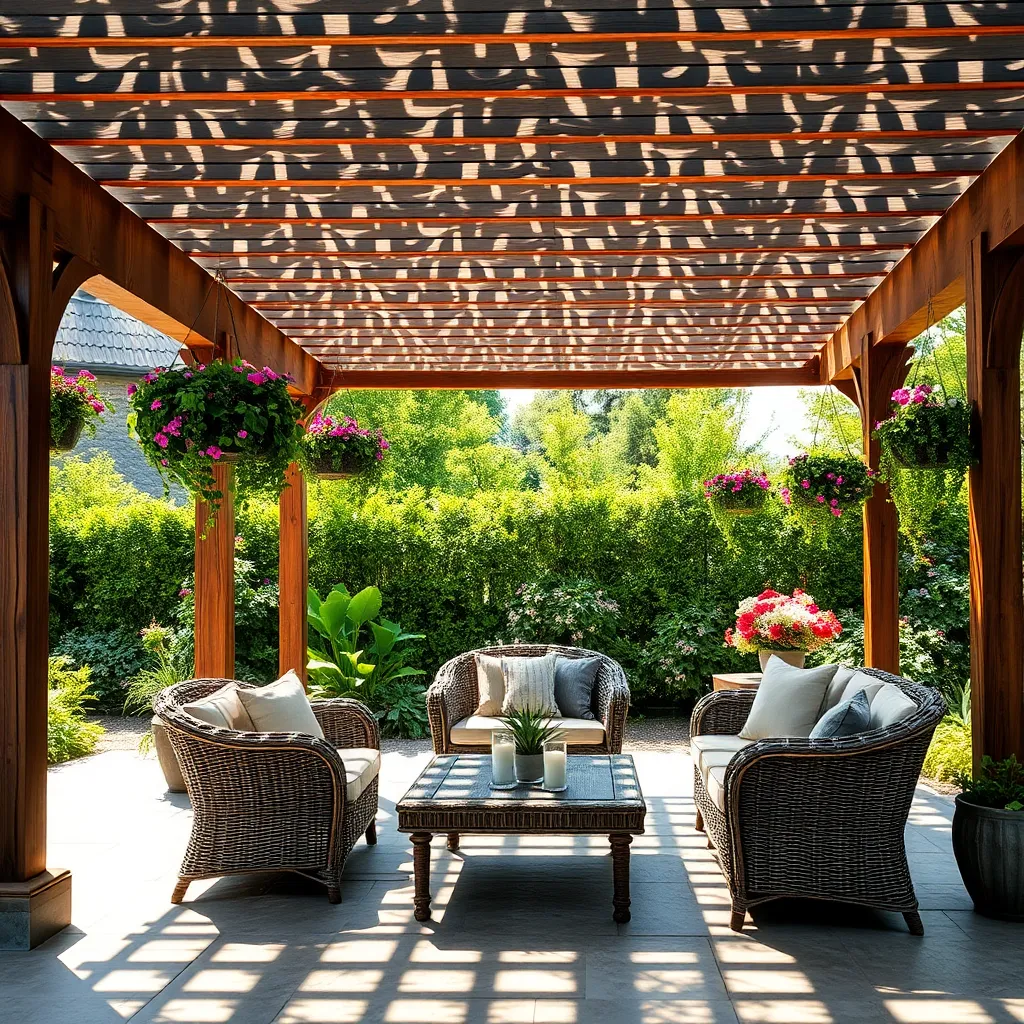
Hanging planters are a simple yet effective way to add vibrant color and life to your pergola. Choose lightweight, durable materials such as resin or metal for your planters, ensuring they can withstand the elements. For beginners, start with easy-to-grow plants like petunias or ferns, which thrive in hanging environments. Attach sturdy hooks or brackets directly to the pergola beams, spacing them evenly to maintain a balanced look.
For those seeking a more advanced touch, consider layering different plant heights and textures to create depth and interest. Use a mix of trailing plants like ivy or lobelia, combined with upright varieties like geraniums, for a dynamic display. Ensure your pergola can support the additional weight by using heavy-duty hardware and regularly checking for secure attachments. Additionally, incorporate a watering system, such as drip irrigation, to keep your hanging garden lush with minimal effort.
Create a Two-Tiered Roof Design
Adding a two-tiered roof to your pergola not only enhances its visual appeal but also improves air circulation and provides better protection from the elements. Start with a solid foundation by using pressure-treated wood for the main structure. Ensure the lower tier is slightly larger to support the upper layer effectively. For a durable finish, use weather-resistant materials like cedar or redwood, which are both aesthetically pleasing and capable of withstanding harsh weather conditions. These woods are excellent choices for beginners due to their ease of handling and resilience.
For the advanced DIY enthusiast, consider incorporating metal or polycarbonate panels for the upper tier to create a modern look and allow natural light to filter through. Angle the upper tier slightly to facilitate water runoff, ensuring your pergola remains dry and comfortable. Use galvanized steel brackets to securely attach the tiers, providing structural integrity and a sleek finish. To add a personal touch, paint or stain the wood to complement your backyard’s color scheme, creating a seamless integration with your outdoor space.
Paint in Weather-Resistant Colors
When painting your pergola, selecting weather-resistant colors is crucial to ensure longevity and appeal. Look for exterior paints formulated with UV protection and water resistance, which helps prevent fading and peeling over time. Opt for lighter shades to reflect sunlight, keeping the structure cooler and reducing heat absorption—perfect for a comfortable summer retreat. Consider using oil-based or high-quality acrylic paints for superior durability and resistance against the elements.
For an advanced touch, incorporate a color scheme that complements your garden’s existing palette, enhancing the overall aesthetic of your outdoor space. Consider using a primer before applying your chosen paint to improve adhesion and longevity. If you’re feeling creative, you might even try a two-tone effect to highlight architectural features such as beams and posts. To maintain a fresh look, remember to touch up any chips or scratches annually, ensuring your pergola remains a stunning focal point in your backyard oasis.
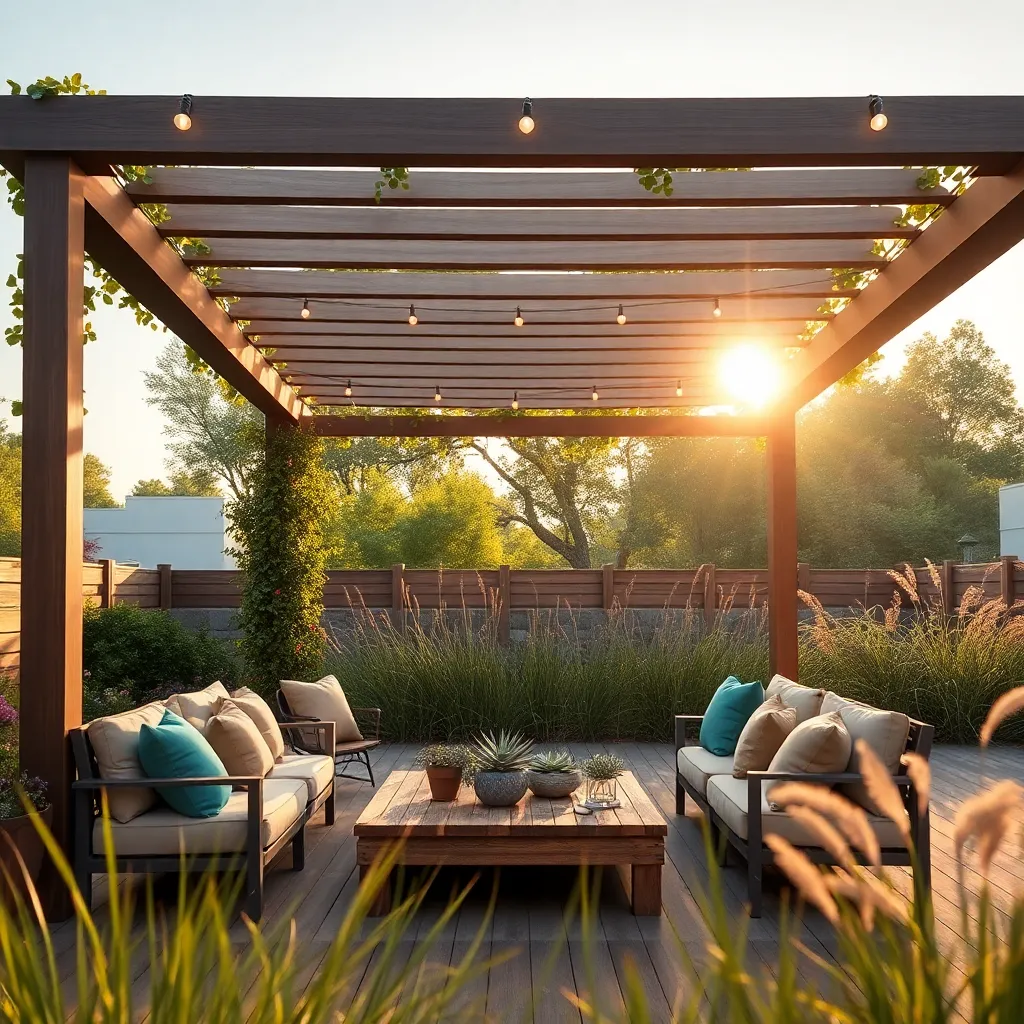
Incorporate Solar-Powered Lighting
Embracing solar-powered lighting in your pergola design not only enhances the aesthetic appeal but also boosts sustainability. Begin by selecting solar lights that suit your style, such as string lights, lanterns, or spotlights. Ensure they are weatherproof and place them strategically to illuminate seating areas or pathways. For beginners, focus on easy-to-install options with built-in solar panels, while more experienced DIYers might consider integrating solar panels on the pergola roof to power multiple fixtures.
For a seamless look, consider mounting solar path lights along the perimeter of your pergola or weaving solar string lights through the beams. Choose lights with adjustable brightness to customize the ambiance, and opt for those with a long battery life to last through evening gatherings. By incorporating these lighting elements, your pergola will not only be functional after dark but also a cozy retreat that encourages extended enjoyment of your outdoor space.
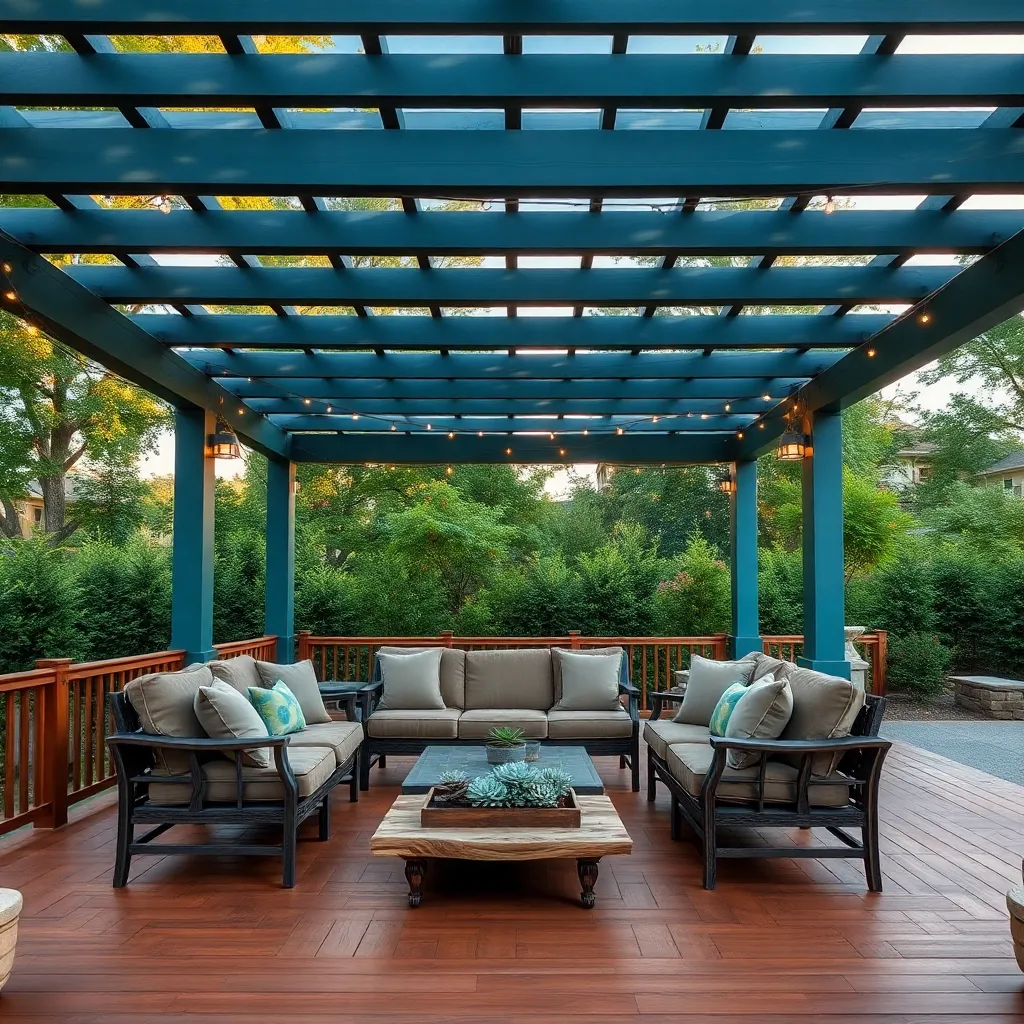
Design with Modular Pergola Kits
Consider using modular pergola kits to simplify the process of enhancing your backyard. These kits come with pre-cut and pre-drilled materials, making them ideal for beginners who want a straightforward project. Look for kits made of durable materials like cedar or vinyl, which offer longevity and low maintenance. Opt for a customizable kit if you want to add personal touches, such as hanging planters or integrated seating.
For those wanting to elevate their design, advanced kits offer features like adjustable louvers or built-in lighting channels. Ensure your chosen kit includes a clear set of instructions and the necessary hardware to avoid any surprises during construction. If you’re planning a larger installation, measure your space carefully and consider adding anchoring systems to ensure stability in windy conditions. Whether for a cozy corner or a grand garden centerpiece, a modular pergola can transform your outdoor oasis with style and functionality.
Conclusion: Creating Beautiful Outdoor Spaces
As you explore these 12 DIY pergola ideas to transform your backyard into a stunning oasis, remember that each concept is more than just a design choice; it’s an opportunity to cultivate a nurturing environment for your relationships. From creating cozy corners for intimate conversations to designing open spaces for gatherings, each pergola idea encourages connection and togetherness. Whether you’re building a rustic retreat or a modern sanctuary, these projects foster collaboration, creativity, and shared memories.
To start your pergola journey, choose the idea that resonates most with your relationship goals and set a date to begin the project together. This shared experience not only enhances your outdoor space but also strengthens your bond by working towards a common vision.
Be sure to bookmark this article to revisit these creative ideas as your relationship evolves and your backyard needs change. Embrace these projects as stepping stones to deeper connections and lasting love. As you invest time and effort into your surroundings, you’re also investing in the success of your relationships, ensuring a flourishing future filled with joy and harmony. Let your backyard become a testament to the beauty and resilience of your bonds.